Showing posts with label soap. Show all posts

Monday, March 28, 2011

And We Have a Winner!


The winner of today's Sheep's Milk Soap Balls Giveaway is:

Andrea?  Or Morgan?  You didn't leave me a way to contact you directly, but back on January 16th you entered the giveaway by leaving the following comment:
ANDREA said...
I love the idea of giving away extras. I have a small farm in Tacoma and I give away my extra eggs. People try to give me money, but I am raising chickens for fun and it makes me smile to give something away. Maybe some day I will sell my eggs. Keep up the good work. I also follow you on Facebook. Morgan

So, Andrea/Morgan, if you're out there, email me at inglesidesheep@aol.com and give me your contact info so I know where to send your soap!

Thanks for playing, everybody.  Don't forget, there will be another giveaway when our Facebook page reaches 1,200 fans.

Saturday, March 26, 2011

The Shampoo Soap Experiement

Shortly after I started learning to make soap, I started noticing other soap makers selling "shampoo bars."  My hair is waist length, thick, curly and dry---not the easiest type of hair to manage.  Over the years I've tried many different products on it, but it had never occurred to me that you could use bar soap on your hair.

Not just any bar soap, of course.  Handmade bar soap, that was free of all those nasty, drying chemicals that seem to be universally added into every commercial brand of soap and shampoo.  I'd already seen the difference using my own handmade soap makes in giving me softer, smoother skin.  So I decided to be my own "guinea pig" and try shampooing my hair with it.


For the experiment, I decided to use my Pure Castile Soap because it's the purest, simplest soap there is, made of just olive oil, water, and lye.  A few strokes of the bar across my wet hair, and I had enough to work up a nice gentle lather.  It worked great!  Why had I assumed that shampoo had to be liquid?

The thing I noticed immediately was that my hair felt clean and sleek right away.  The soap rinsed out quickly and easily (as with most soap, it does sting if you get it in your eye, so be careful!).  When I use commercial shampoos, I usually end up using a large handful of conditioner just to be able to get the comb through my hair afterward, but it seemed a shame to apply commercial conditioner after washing my hair with natural soap, so I decided to try skipping the conditioner entirely.  To my surprise, that worked okay too!

Since then, I've been using my Castile soap every time I wash my hair.  Sometimes I put a little conditioner on, sometimes I don't.  Either way, my hair ends up feeling softer than usual, and I have noticed a striking decrease in the amount of hair breakage.  I would estimate that I have less than half the amount of breakage than I had when using commercial shampoo.  That was a complete surprise!

If you'd like to try your own shampoo experiment, you can find my homemade Castile soap in my Etsy shop.

Friday, March 25, 2011

Another Soap Ball Giveaway

Hey!  While I wasn't looking, we reached another of the milestones I set out to trigger another giveaway:  This blog now has 100 followers.  Thanks everybody!


I'm going to give everybody until noon on Monday to enter to win, then I'm going to randomly pick a winner.  If you've already entered to win before, you don't need to enter again.  If you do need to enter, go to this blog post and leave a comment.

Don't forget:  I'll do another giveaway when my farm's Facebook page reaches 1,200 fans.  That's the place to hear all the daily details about what's going on here at Ingleside Farm, so join us, and recommend us to your friends too!

Tuesday, March 8, 2011

Rendering Lard

As I noted in my previous post, the overweight hog we sent to the butcher recently produced---in addition to a freezer full of pork---more than 75 lbs. of fat, which I have been rendering into lard.

The first question people ask when I tell them I've been rendering lard all week, is:  "Why?  No health-conscious person cooks with lard anymore, do they?"  In fact, that's not the case at all.  As described in these various articles, lard is a lot healthier than most people think:

Lard:  The New Health Food
Lard Has Clearly Won the Health Debate
Praise the Lard
Lard:  After Decades of Trying, Its Moment Is Finally Here
Trans Fatty Acids:  Why Lard May Be Better for You Than Vegetable Oil

Of course, even with the unexpected benefits, I'm not planning to eat 75 lbs. of lard this year!  Some of it I'll save for cooking, but the majority I'll make into soap.

Lard soap is mild and gentle to the skin, and it will be great to have some "zero mile" fat for soap making (as opposed to the olive oil I use to make my sheep's milk soap, which is imported from thousands of miles away).  I'll still keep making the olive oil based soap, since it's been very popular, but the natural farmstead lard soap will give buyers an additional option.  Choice is good!

Anyway, since a lot of people have never rendered lard before, I figured I'd show the process, step by step, here on the blog.  Rendering isn't difficult, but it does take a while, so you have to be patient.

Since I had such a huge amount of lard to render, I had to do it one portion at a time over several days, according to how much would fit into my largest stock pot.

Our hog was very large and very obese, so he produced 22.5 lbs. of leaf lard and 53 lbs. of back fat lard.  The leaf lard is the internal fat from around the pig's kidneys.  It is considered the highest quality lard, since it's said to have a finer texture and a more neutral flavor than the back fat lard.

Here is one of the slabs of leaf lard from our pig.  We got two slabs this size.


The slabs of back fat were even larger.  Folded over themselves and stacked together, they filled an entire banana box!

The first step was to cut off chunks of fat that were a more convenient size to handle.  Here's a chunk of back fat, ready for me to start processing.


To get a neutral (not so porky) flavor to my lard, I trimmed off all the little scraps of meat.  Then I cut the fat into little chunks, maybe about 1" square.

The discarded scraps of fatty meat made a VERY popular snack for my chickens!


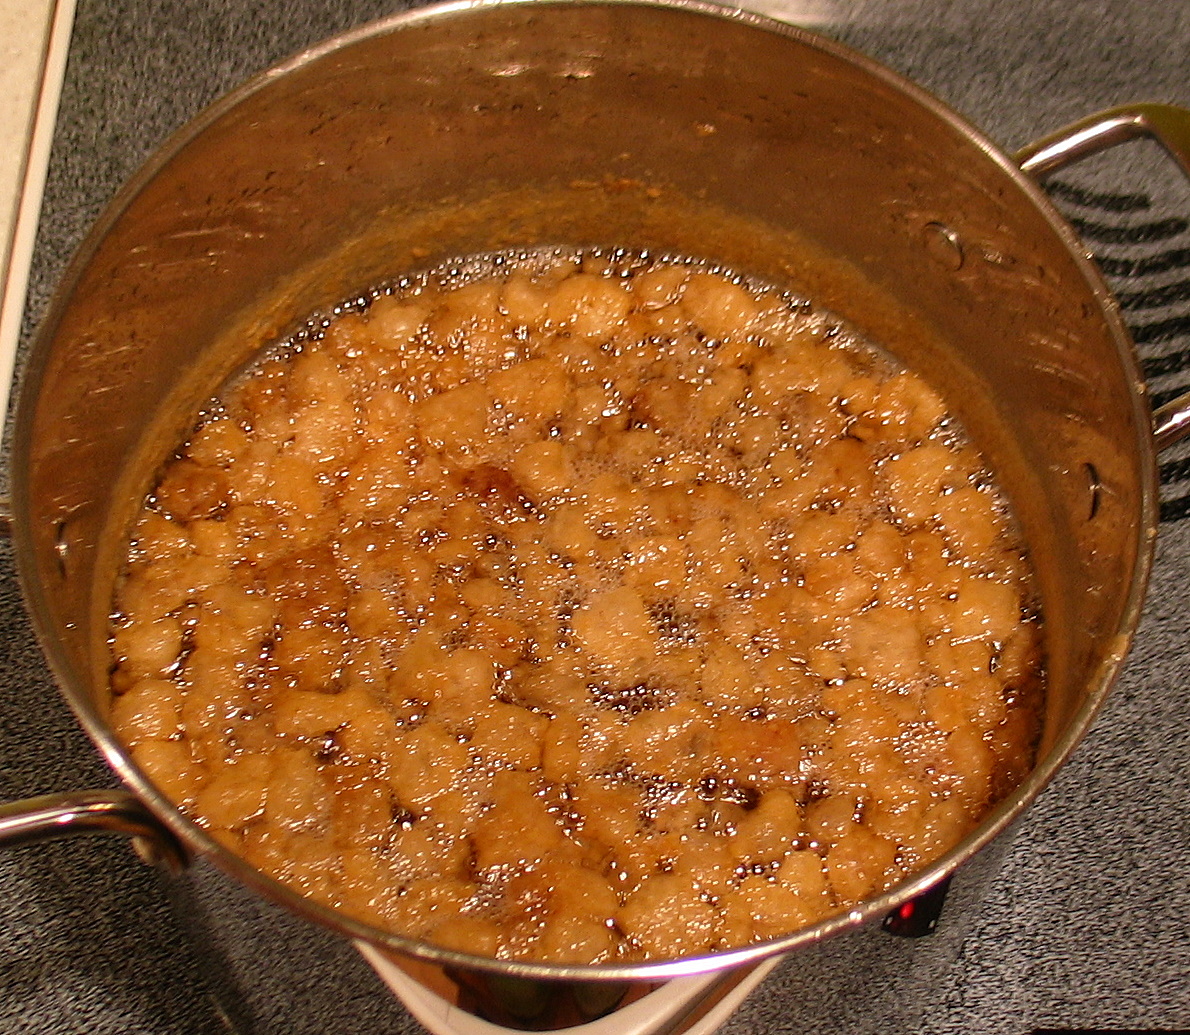
To begin the rendering process, I put a couple of inches of water in the bottom of my largest stock pot, then filled the rest of the pot with cut-up chunks of fat.  I heated the pot on the stove top until it started to boil, then reduced the heat to a low simmer.  

The water in the bottom of the pot helps prevent the fat from sticking before it has a chance to melt.  By the time the rendering is finished, all the water will have evaporated away.  

You do need to stir the pot (less in the beginning and more frequently toward the end), to prevent the solids from sticking to the bottom and burning on.  


Almost immediately after the boiling started, the fat changed color and began to get translucent.


Little by little, the chunks of fat started to release quantities of melted liquid lard.


For a while, the liquid in the pot was a milky whitish color.  It was at this point that the pot began to need more frequent stirring, because the solids started sinking to the bottom.


Eventually, the liquid turned clear.


The smaller solids sank to the bottom.  It was hard to keep them from sticking to the bottom of the pot!  Meanwhile, the larger solids puffed up and floated on the top of the liquid.


When the floating bits turn golden brown and slightly crispy, the rendering process is done.  For a pot this size, it took about 6 hours.


Next, I strained the rendered lard through a strainer lined with several layers of cheesecloth.  The solids that are left in the strainer are "cracklings."  You can salt them and eat them as a snack, cook them in cornbread, sprinkle them on salads, or use them anywhere else you might use bacon bits (they don't taste like bacon, though.  They taste---not surprisingly---like pork rinds).

The cracklings from the backfat came out chunky, as shown in the picture above.  The cracklings from the leaf lard came out in smaller crumbs.


I'm storing my cracklings in ziploc bags in the freezer until I'm ready to use them.  

The rendered, filtered lard itself I poured into mason jars.  I had originally thought I would pour the lard into molds and store it in blocks like pounds of butter.  But unlike the partially hydrogenated lard you can buy in blocks from the grocery store, this lard is still liquid at room temperature, so jars turned out to be essential!

When the lard was first poured into the jars, it was a clear, pale, golden color.


By morning, it had cooled down and turned pure white, but it was still liquid.  It does turn into a solid if you put it in the refrigerator or freezer.
I'm going to store my lard in the freezer until I need it.  Frozen, it should keep almost indefinitely.

From the 75 lbs. of fat I got from my pig, I rendered about 37 quarts of lard.  That will make an awful lot of pie crusts and and awful lot of bars of soap!

Tuesday, January 18, 2011

First Soap Giveaway Winners

Yesterday, we reached TWO of the four "milestones" I'd set for my latest soap giveaway, so today I'm giving away two sets of hand-rolled Sheep's Milk Soap balls.


The winners are... (drum roll, please!)

(1)  Justine---You didn't leave an email address Justine, so I hope you're reading this!  Email me at inglesidesheep@aol.com to tell me your shipping address so that I can send you your soap.

(2)  Yarnabees.  I've already sent you an email, all I need now is your shipping address

Congratulations to our two winners!

There are still 2 more giveaways waiting to happen, so don't forget to enter.  All you have to do is comment on the giveaway's blog post for your chance to win.

Saturday, January 15, 2011

New Giveaway: Sheep's Milk Soap Balls

Time for a new giveaway, and this time it's something new:  handmade sheep's milk soap balls!

As many of you may know, thanks to the success of my Kickstarter soap making project, I've been able to start making all of our luscious sheep's milk soap right here on the farm instead of hiring an outside person to do it for me.  I'm currently in the process of building up inventory, which takes a while because after the soaps are made, they have to cure for a few weeks before they're ready to be sold.

I have a small amount of soap that is ready to go now (contact me directly if you'd like to buy some), and a much larger amount that will be ready in early February.

But meanwhile, I'm giving some away. 

I make all of my soap in small batches, and pour it into molds that hold about 6 lbs. of soap at a time.  Sometimes after filling the molds, I have a little bit of soap left over.  That soap gets made into old-fashioned, hand-rolled soap balls.


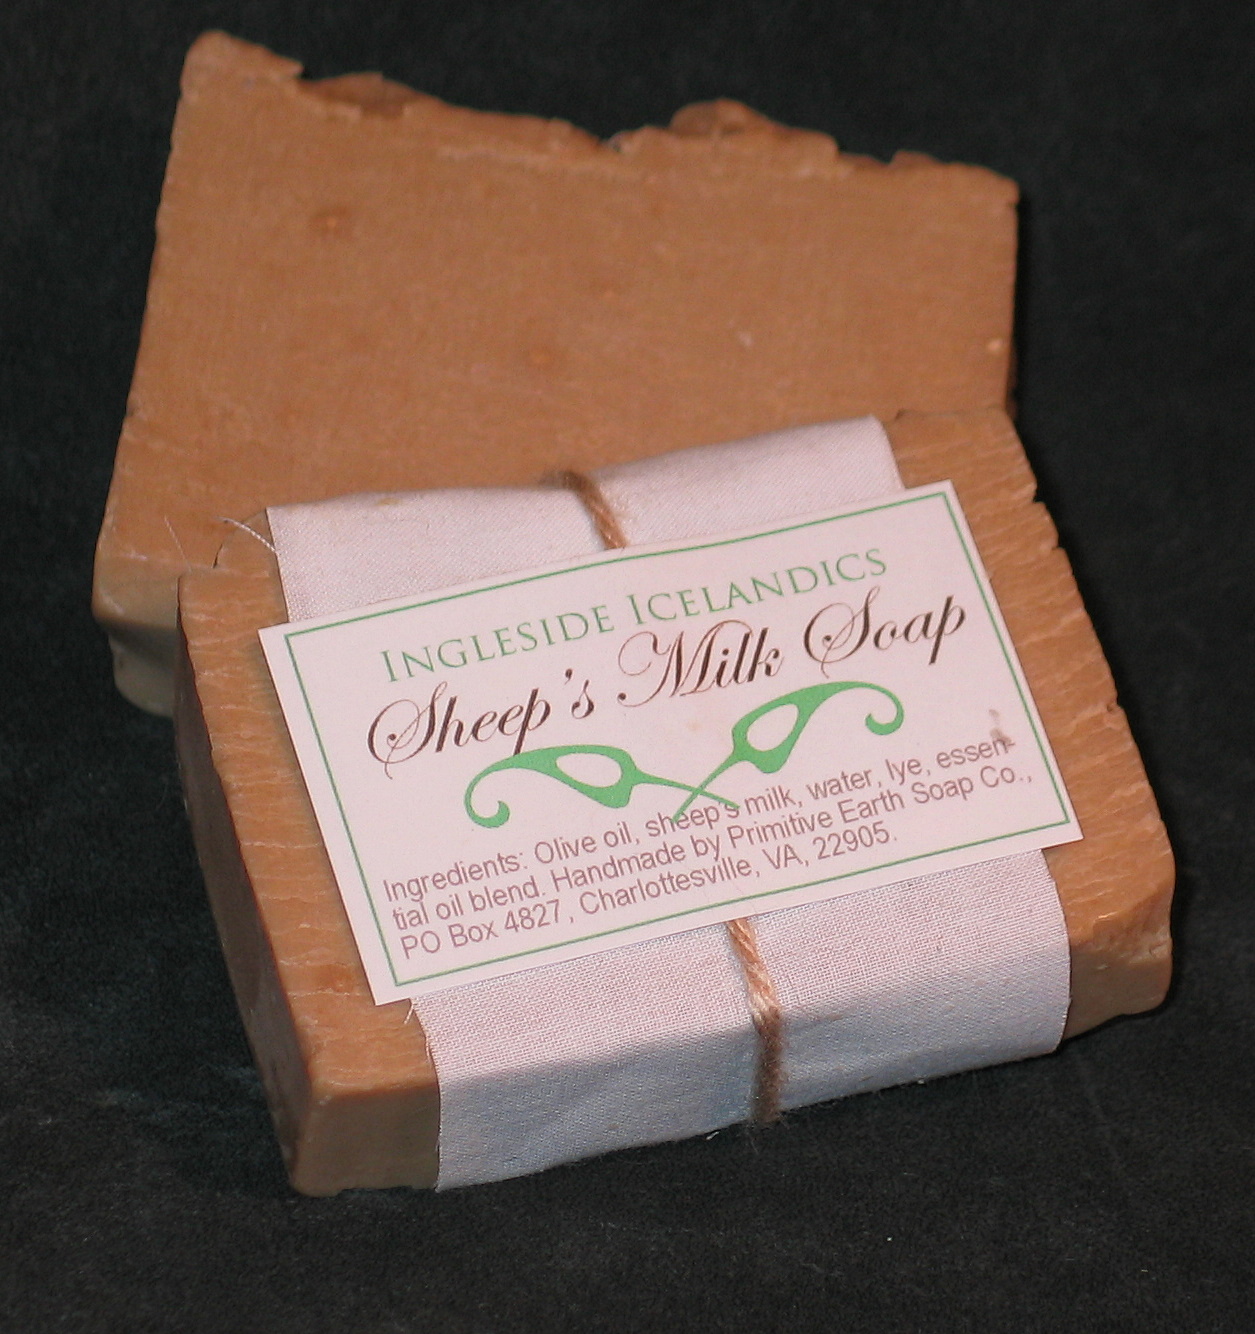
They are decorative as well as practical, and are made with the exact same natural ingredients as my regular bar soap:  olive oil, sheep's milk from my own flock of Icelandic sheep, water, lye, and essential oils.  They are very mild to your skin, and they smell great.

I'm going to give away four sets of three soap balls.  These giveaways will happen at four different "milestones":

1.  I'll give away one set of soap balls when our next batch of piglets are born.  That could take place any time in the next few days, so enter soon!  If you click the link above, you can also enter our "Guess A Piglet" contest for a chance to name one of the piglets when they are born.

2.  I'll give away another set of soap balls when the number of "Likers" for the farm's Facebook page reaches 1,100.  As I type this, we need only 12 new likers, so this could happen almost immediately.  Feel free to use the "Suggest to Friends" feature (right under the ram photo in the upper left corner of the page) to help speed things along!

3.  Getting 12 new likers for our fan page is too easy a goal.  Let's make you work for the next one!  I'll give away another set of soap balls if you can push our number all the way up to 1,200.  Recommend us to your friends, and don't forget to let them know that they can enter to win some soap balls too.

4.  See that column on the right hand side of this blog page?  The one with my photo and the blog archive and all that?  Right below the blog archive is a listing of this blog's followers, with an easy button to click to become a follower.  When the number of followers listed there reaches 100, I'll give away the last set of soap balls.  If you're not a follower, please consider becoming one.  And if you have friends who like to read about farming, nature, and hand crafting, encourage them to follow as well.  That way, you'll all be first in line to get the news when I announce my NEXT giveaway!  :-)

Okay, I've told you the "What" and the "When" of the giveaway.  Now you need to know the "How," as in "How do I enter to win these marvelous soap balls?"

It's easy as can be:  Just post a comment on this blog entry. 

Make sure to include some way of contacting you if you win---If you comment anonymously, I may not be able to reach you to tell you you're a winner.  Winners will be selected at random from among all the people to comment on this post.  I'll contact winners by email to get their shipping address, and the winning names will be announced on this blog.  One entry per person, please. 

Now, go win yourself some soap!  :-)


Monday, January 10, 2011

New Soaps

I made about 50 lbs. of soap in the past few days, starting to build up inventory as I complete my transition into making my own soaps instead of hiring someone to do it for me.

I made 25 lbs. of my regular Amber-scented sheep's milk soap.  Then for a little variety, I made some unscented sheep's milk soap, and some pure castille soap.  All of my soaps are technically castille soap, since they are made with 100% olive oil, with sheep's milk and essential oils added.  But pure castille soap has only 3 ingredients:  olive oil, water, and lye.  All olive-oil based soaps are known to be exceptionally mild and gentle to the skin, although they don't make lots of lather.  Personally, I love how much softer and smoother my skin feels after using my sheep's milk soap.

Anyway, I was interested to see how the new varieties turned out.  I had suspected---but didn't know for sure---that without the dark-colored essential oils added, my sheep's milk soap would be an entirely different color.  And I was right.  The scented sheep's milk soap is a rich brown color, while the unscented version is a beautiful pale cream that is barely distinguishable from the one-shade-lighter pure castille.

Here's what they look like.  On the left is the amber-scented sheep's milk soap.  In the center is the unscented sheep's milk soap.  And on the right is the pure, unscented castille soap.


All these new soaps need at least a couple of weeks to cure, then they will be available for sale on my website and Etsy.

Monday, November 1, 2010

Giveaway Winners!

Drum roll please!  Here are the winners for our three big giveaways.


 1 bar of sheep's milk soap goes to:
  • Brooke
  • Natural Garden
  • Susie
  • Ackermari
  • Daneen


The Icelandic fleece goes to:
  • Sleepypinesaz


And last but not least, the hand spun, hand knitted scarf goes to:
  • Zoe
Many thanks to all who participated!  Winners---please email me your contact info so I can send you your prizes!

Monday, October 25, 2010

Don't Forget to Enter our THREE Free Giveaways!

Time is running out to enter our three big giveaways!  To enter, all you have to do is go to the appropriate blog post for the prize you want to win and comment on that post.  Only one entry per giveaway, but you can enter all three giveaways if you want:

Free Sheep's Milk Soap Giveaway  <---Click on this link, then post a comment.
I said I'd give away free bars of sheep's milk soap to five people if my soap making project on Kickstarter met its funding goal.  The project met its goal in just over a week, so this giveaway is definitely happening.  I'll give everybody one more week to enter, then I'll announce the winners on November 1.


Free Icelandic Fleece Giveaway <---Click on this link, then post a comment.
I said I'd give away this lovely Icelandic sheep's fleece when my farm's Facebook page reached 1,000 fans.  We're at 990 fans now, so we only need 10 more to go before this giveaway happens.


Free Handspun Wool Scarf Giveaway  <---Click on this link, then post a comment.
I said I'd give away this hand spun, hand knitted scarf when my farm's Facebook page reached 1,000 fans.  We're at 990 fans now, so we only need 10 more to go before this giveaway happens.


Don't miss your chance to win.  Enter today!

Soap Making Equipment

I'm very pleased to announce that my Kickstarter project reached its funding goal in just over a week, so my soap making project WILL be going forward.  Hurray!  Many thanks to our generous backers!

I won't receive the actual funds for about another month (who knew we'd reach the funding goal so quickly?), but I want to get started on the project as soon as possible because I'm going to try to have all the backers' soap finished and cured in time to mail before the holidays.

Knowing that the project money will be coming in, I was able to advance myself some money from my hay-buying fund and spend the weekend shopping.  Saturday we went in to town and got most of the soap making equipment.  Sunday I went online and ordered the supplies.  I only have a few more minor items to pick up while I wait for the supplies to arrive.  Then I'll be ready to make my first soap!

Here's what I have so far:

  • A large stainless steel pot to contain the soap ingredients while I blend them

  • A stick blender for mixing the ingredients


  • A digital food scale to precisely measure the ingredients

  • Two digital thermometers to check the temperatures of the oil and the lye-water


  • A heavy duty plastic pitcher to contain the lye-water and allow for safe, easy pouring


  • A large Pyrex measuring cup to hold the dry lye


  • Heavy duty silicone spoons and ladle for stirring and transferring the soap before it hardens


  • Safety gear:  Apron, rubber gloves, goggles, and mask.  The goggles and mask are ones I already had for crafting, but I'll get new ones to be designated specifically for soap making.


  • Wax paper, masking tape, and scissors for lining the soap mold.  The scissors and wax paper we already had.


  • Wooden soap mold with cover and soap cutter.  I had already purchased this one online here.  Once I try it and determine that it works well for my needs, I'll probably buy a couple more.  This is the 6-lb. version, that makes 20 bars of soap at a time.


  • Soap making books.  These books are ones I had already collected over the years, but I did order three more online:  one a good general soap making book, and two devoted specifically to making milk soaps, which are slightly trickier than non-milk soaps.


Also ordered online:  several gallons of olive oil, 10 lbs. of lye, and a quantity of the essential oils needed to make our exclusive essential oil blend.

I already have a good supply of sheep's milk waiting in the freezer, but I'll still have to buy some distilled water to complete the recipe.

Wednesday, October 13, 2010

Free Sheep's Milk Soap Giveaway

Here's giveaway #3:

As I mentioned in my earlier post, I've launched a project with Kickstarter.com to raise funds to get the equipment and supplies necessary to start making all of my luscious sheep's milk soap right here on the farm instead of hiring an outside crafter to make it for me. 

 
The Kickstarter projects work on an all-or-nothing funding scale.  Which means I have to meet my $500 funding goal by November 15th, or none of the funding goes through.

If you help fund this project, there are lots of great rewards, including selections of our soaps and even a 2-day sheep farm adventure where you and a friend can join us here on the farm for two days during lambing season in April.


To encourage people to help me spread the word about this project, I'm also offering a giveaway:

If the Kickstarter project meets its funding goal by the November 15th deadline, I will give away a free bar of our luscious handmade sheep's milk soap to FIVE different people. 

To enter, all you have to do is comment on this blog post.

But remember, the giveaway only happens if If the Kickstarter project meets its funding goal.  Help us reach our goal by forwarding this page to your friends and family, Tweeting about this giveaway, posting a link to this page on your own blog or Facebook wall, etc.


One entry per person for each giveaway, but you can enter all three of our current giveaways if you like:


Free Icelandic Fleece Giveaway
Free Handspun Wool Scarf Giveaway
Free Sheep's Milk Soap Giveaway (this page)

So Many New Projects!

Have you seen?  I've been a very, very busy girl lately, with several big projects to help promote the farm.

First, I finally finished doing a total redesign of the farm's web site.  Not only does it have a whole new look, it also has more than twice as much information about (and pretty pictures of) the farm.  The address is still the same:  http://inglesideicelandics.com/.


The redesign took me forever, and I'm very pleased with the results.  I think it gives a much fuller picture of who we are, what we're doing, and where we hope to go from here.

Second, I've launched a project with Kickstarter.com to raise funds to get the equipment and supplies necessary to start making all of my luscious sheep's milk soap right here on the farm instead of hiring an outside crafter to make it for me.  I'm pretty excited about this, especially since the soaps have become our most popular product.  I just shipped my first order of soaps to Japan, where the charming buyer pronounced them "very splendid."  Isn't that sweet?


I've also been working on increasing our fan base on the farm's Facebook page.  I'm so honored that more than 900 people count themselves among our fans already!  I have so much fun interacting with the people there and sharing bits of daily life from the farm .

To celebrate all these projects, and express my appreciation for all the fans and customers who help make it all possible, I've decided to do not one, not two, but THREE big giveaways.

To keep the entries for the giveaways separate, I'm going to give details of them in three separate blog posts, coming right up:

Free Icelandic Fleece Giveaway
Free Handspun Wool Scarf Giveaway
Free Sheep's Milk Soap Giveaway

Saturday, June 5, 2010

Name That Lamb Contest: Grand Prize and Finalists

As I promised back in March, everyone who submitted a winning name to my Name That Lamb contest gets one entry (per name) into my grand prize drawing at the end of lambing season.

Well, guess what?  It's the end of lambing season now, so it's time to announce the finalists.  Just to add a little bit of suspense, I'm going to wait until Monday to announce the grand prize winner.  But I don't have to wait that long to announce what they will win!

One lucky participant will win the following assortment of fun sheep-and-lamb related goodies from our farm:

1 bar of Sheep's Milk Soap


1 bar of Felted Sheep's Milk Soap

1 pack of "Sound Asleep" lamb notecards
1 "Peekaboo" lamb magnet

1 pair of Ear Tag earrings

1 pair of needle felted Fortune Cookies

Total value of the whole collection:  $45.50


Now for our list of finalists (including the number of entries each one earned:

Beth at www.cotondogs.net   (5 entries)

Carol at http://plumpfairy.etsy.com (1  entry)

Carol Volker of http://loafkeeper.com (6  entries)

Catherine Sanchez (no web link given)  (1  entry)

Channa at http://www.ohsewnice.co.uk (2  entries)

Chris Conrad of http://www.facebook.com/chris.conrad (3  entries)

Cindy of http://www.etsy.com/shop/mommysdream (1  entry)

Debra Chase (no web link given) (1  entry)

Donna Chase of http://siberia-farm.com (1  entry)

Elizabeth Brockman (no web link given) (4  entries)

Jeanne (no web link given) (3  entries)

Laurel McGilvery (no web link given) (29  entries.  If that seems like a lot, it's because Laurel earned it.  She submitted more than 300 name suggestions!)

Molly Bailey of http://www.baileygirl5.blogspot.com (2  entries)

Monica of http://crazyhousequilts.wordpress.com (1  entry)

Pat at http://www.patelliottpaintings.co.uk/ (2  entries)

Robin at www.mommymommyland.com (3  entries)

Rowena at http://cherrypik.blogspot.com (1  entry)

Skye (no web link given) (2  entries)

Stephen Pappas  (no web link given) (7  entries)

Tika at http://theyellowjournalist.blogspot.com (7  entries)


Stay tuned on Monday to find out who is the winner!

Thursday, April 29, 2010

The Great Sheep-Milking Experiment

Last year, when Tansy lost her lamb at birth, I decided to try milking her a little bit, to get milk for making sheep's milk soap.  Twice a day, I'd tie her to a post with a dish of grain under her nose, and try to milk her while she leaped and kicked and struggled.  While I did end up getting enough milk for a small amount of soap, the experience was not a pleasant one for either Tansy or myself.

This year, for some unknown reason, Tundra lost both of her lambs at birth.  I have no idea what happened.  When I found them, they looked fully formed and uninjured, but dead, as if they had never gotten up after being born.

Anyway, since Tundra would have no lambs to nurse, I decided that I'd milk her, but this year I'd use the shearing stand to restrain her.  The shearing stand turned out to be a great idea.  Unlike Tansy last year, Tundra stood still for the milking.  However, it had been about a day since her lambs had been born, so she was already starting to dry up.  Everyone says that the more you milk, the more the ewe will produce, so I kept at it for a week, but Tundra's production was still very low.  Unfortunately, me with the Udderly EZ Milker twice a day is just not the same as a pair of hungry lambs, as far as stimulating milk production.

But my sheep's milk soap has been selling quite well, and I want to make a much larger supply of it this year.  So I needed sheep's milk.  Lots more than Tundra was producing.

So, the Great Sheep-Milking Experiment was born.

What if, instead of milking one sheep twice a day for the whole summer, I instead milked ALL the sheep once or twice and was done with it?  After all, the other ewes were actively feeding their babies, so I knew they were producing much more milk than Tundra was.

So, I rounded up all the ewes whose lambs were at least a couple of weeks old, and separated them from their lambs overnight.  What a racket they made, bawling for each other!  They could see each other and touch noses through the fence, though, so they could each see that the other wasn't lost.

In the morning, armed with the Udderly EZ Milker, I set out to milk 18 ewes who had never been milked before.  Little did I know it was going to take most of the day! 


I had to round up the ewes into a catch pen, then physically drag each one to the shearing stand, fasten her in, then crank the stand up to a comfortable height.  Wash the udder, and attempt the milking.  Some of the ewes kicked, but I was able to use the milker with one hand while encircling the kicking foot with my other hand, to guide it away from kicking the milker.  Once the kicking ewes discovered their struggles weren't working, they eventually settled down and stood still.

Over all, I was surprised on how well behaved most of the sheep were, but it was still hard work manhandling them on and off the stand and taking them out afterward to the paddock where their hungry babies waited.

Between each milking, I took that ewe's milk inside, filtered and labeled it, and put it in a Ziploc bag in the freezer.  When I make my soap, I like to be able to tell my customers exactly which sheep provided the milk for that soap.  So now my freezer has lots and lots of labeled bags!

I've been told that experienced milkers who milk their Icelandics regularly can get 1 quart per milking.  My average was probably closer to half that, but for a first attempt I feel like the sheep and I accomplished quite a lot.  Because I kept a list of how much each ewe produced, I also have a better idea of which ones are the most worth milking again next time.

Mostly, I already knew which of my ewes were the milkiest (Paris, as expected, was the best.  She gave me 3.5 cups).  But there were a few surprises, a couple of adult ewes I had not realized were as milky as they were, and one yearling first-time mother who gave as much as the adults. 

So in addition to getting enough milk to make more than 600 bars of soap, I also got valuable information about the productivity levels of my ewes.

I'll probably do it again one more time, to meet my goal of how much soap I want to make this year.  I won't do so many ewes at a time again, though.  It took me so long to milk them all, I felt it was too uncomfortable for both the ewes and the babies to have to wait so long.

I ache from all the exertion yesterday, but when I think that with just one day of hard work I got more than half of my milk-supply goal for the year, I think the sheep milking experiment was a big success!

Tuesday, March 2, 2010

Soapnuts: A Totally Natural Laundry Soap

I don't usually make a practice of doing product reviews on this blog, but this product is just so cool, I have to tell you about it.  I'm not affiliated with the company in any way.  I just thought this was an interesting product.

Soapnuts are nothing more than the dried fruit of a Himalayan tree (Sapindus Mukorossi).  They contain saponin, the natural substance that makes soap soapy.  You just put 3-4 of the little, grape-sized dried fruits into the included muslin bag, pull the drawstring closed, and toss the bag in with your load of laundry.  

That's it.  They get your laundry clean naturally.  No petro-chemical-based detergents, no bulky plastic jugs to fill up our landfills.  The 3-4 nuts you put in the bag can be used for up to 4 loads of laundry before they lose their effectiveness.  Then you can just compost the spent ones and refill the bag with a few more.


You can use Soapnuts in a lot of other ways too, from household cleansers to shampoo.  Check out their website for more info.

Monday, February 22, 2010

Why Make Felted Soap?

Ever since I posted my tutorial on How to Make Felted Soap, lots of people have been contacting me, all asking the same question:

"WHY make felted soap?"

Oops! I guess I didn't explain that fully in the tutorial, did I? Sorry!

Wool felted around a bar of soap forms a natural scrubby, with pleasant, gentle exfoliation, like a good washcloth.

It also makes the soap easier to grip. As the soap is used, the wool shrinks to fit what is left, so you can use the whole bar, avoiding those slippery little end bits of soap that are hard to hold, slip down the drain, and are wasted.

When the soap is gone, you can even cut a slit into the remaining felt "jacket" and use it as a small pouch! Or fill it with catnip for an all-natural cat toy.

Also, if you've never tried felting before, felting around a bar of soap is a quick, easy project, perfect for a beginner.

It's easy enough for kids to do, so it makes a fun craft activity for them. They may even enjoy bath time more if they get to use the results of their project! :-)

If you would like to try it, Soap Felting Kits and finished Felted Soaps are available here.

Wednesday, February 17, 2010

How to Make Felted Soap

Since one of the options in my current giveaway is a Soap Felting Kit, I thought I'd make an instructional video and post it here, so everyone can see how easy it is to make your own felted soap.


Prefer written instructions? No problem! Below are the basic soap-felting instructions that come with our kit:


Felted Soap Instructions

Felting over a bar of soap is easy and fun. Besides the soap and wool included in this kit, the only things you need to provide are a bowl of hot water and about 15 minutes of your time.

Your hands will get wet and soapy while you’re doing this, so you’ll want to work on a counter or tabletop that won’t be harmed if it gets damp. You may want to set out a clean towel to wipe your hands on, and to set your finished soap on to dry.

Ready to get started? Let’s go!

1. Fill a medium sized mixing bowl with hot water. The water should be as hot as you can comfortably put your hands in. Don’t make it so hot that you burn yourself!

2. Remove the wrapper and label from your soap.

3. Take the wool out of its bag and set it nearby so you can reach it easily, but where it won’t accidentally get wet before you’re ready to work with it.

4. You’ll find that your wool separates naturally into fist-sized lumps because of the way that it has been carded. Take one lump and gently unroll and spread it so that it is fairly flat and even. Wrap this pad of wool gently but snugly around your bar of soap.

5. Take a second lump of wool, spread it out, and wrap it around your soap in the other direction. If you wrapped the wool lengthwise the first time, wrap it around the width of the soap this time. Try to spread all the fibers around so that all surfaces of the soap are covered.

6. Repeat the previous step, always alternating the direction that you’re wrapping the wool, until your soap is thoroughly covered. I usually find that 3 lumps of wool are about the right amount. You will probably have some wool left over when you’re done, so don’t feel like you need to use all of it just because it’s there.

7. Once your soap is thoroughly covered with wool, cup it in both hands to hold the wool firmly in place, and dip it into the hot water. Still holding the wool in place, lift the soap from the water.

8. Gently begin to pat and press the wet wool against your soap. Don’t use too much pressure at first, or you’ll slide the wool out of place and expose the bare soap (If that happens, slide the wool back into place before you continue). The soap will start to lather. Just keep patting, being sure to show equal attention to all sides.

9. As the wool starts to felt, you’ll feel it begin to hold together on its own, without you having to hold it in place. At that point you can begin rubbing the wool more vigorously. If you need to, you can wet your hands or dip the soap in the water again. Slide the soap through your hands over and over, flipping it frequently so that you’re rubbing in all directions. Keep doing this for about 10-15 minutes or until the wool has formed a solid felt pad all around your soap.

10. You’re done! Rinse the soap in the bowl of water one final time to wash off the suds, then place it on a towel to dry.


UPDATE: If you've read all this and you're asking yourself, "Yes, but WHY would I want to make felted soap?" read my followup post.

Monday, February 15, 2010

Ingleside Farm Felted Soap Giveaway!

Today is my birthday, and I want to give YOU a present!

Starting today, I am accepting entries for our big Felted Soap Giveaway. On March 15, I'll choose one winner at random. The winner will receive his or her choice of the following prizes:

(1) Deluxe Felted Sheep's Milk Soap Collection: Five bars of our fabulous felted sheep's milk soap, one in each of our five natural colors. Click the link above for details.


or (2) Deluxe Soap Felting Kit: Everything you need to felt your own soap. You get five bars of our fabulous sheep's milk soap, five 1-oz. bags of pure Icelandic sheep's wool, and a set of instructions. All you need to provide is a bowl of hot water and a few minutes of your time. Click the link above for details.


There are multiple ways to enter:

1. Become our fan on Facebook (If you're already a fan, that still counts).

2. Tweet about this giveaway on Twitter, with a link to this page.

3. Write a relevant post about this giveaway to an appropriate online forum or group (Please don't spam your forums with inappropriate posts!)

4. Write about this giveaway on your blog, with a link to this page (you may use any of the photos above, if you like).

5. Post a link to this giveaway on your web site (you may use any of the photos above, if you like).

By doing more than one of the above activities, you can earn multiple entries, but only one entry per URL, please.

You must send an email to keepingthefarm@aol.com with details of your entries. Put "Felted Soap Giveaway" in your subject line.

Don't forget to include your name and an accurate email address, so I can let you know if you win!